Originally built for SAMI and appeared in a 2005 issue.
The kit.
This is yet another one of Special Hobby very welcome additions to their ever expanding range of 1/72 'Regia Aeronautica' multimedia subjects. As ever, an excellent illustration is used on the carton lid, showing one of the two options covered on the decal sheet. The injection moulded parts are on one sprue, the fuselage halves being on their own, which gives every reason to believe further versions are likely. Overall standard of the engraved panel lines are high, only the cooling vanes on the integrally moulded cowl being just a little bit on the heavy side. The best feature of this model is the amount detail found in the resin & brass etch cockpit parts. As well as nicely rendered side-walls, there is even more items to go behind the pilot seat. It is to the level found in 48th models. The resin engine follows the familiar technique of using separately cast cylinders, but without any push rod detail. Being a Piaggio engine, this will mean 28 lengths of small diameter rod to apply. The canopy is vac-form cast as a pair, the framework accurately portrayed. A complete set of decals for each of the two schemes are provided. The instruction sheet is 2 sheets of folded A4 and a single A5, making up an easy to follow 10 page booklet. Colour notes are from the Gunze Sangyo range only.
Construction.
The cockpit is assembled outside of the fuselage, as is the resin engine. The interior colour used was a pale green, using a mix of Humbrol 78 and white. The various instrument panels and boxes were picked out in black, with the seat, seat frame, pedals and control column in silver. There are a variety of etch metal levers to apply. The etch harness detail completely covers the seat, which means the seat is either too small or the harness detail too big. I personally feel the seat was too small. The completed engine is mounted on a disc which is then glued into starboard fuselage half, along with the cockpit. The other fuselage half fits comfortably around them with no gaps appearing. The top wings are then glued to the fuselage. The one piece lower wing, which has already had the resin wheel well pieces glued in place, was offered up to check the fit. Just a little resin was removed from rear of the wheel wells to enable the wings to meet up properly. The lower wing does fall a bit short at each wing tip, but only needed a touch of filler and sanding to tidy up. The cowling intakes are also applied at this stage and fitted with no problems. A little more definition is given to the gap between the cowl and fuselage with additional scribing. The stabiliser fillet detail moulded on the fuselage was reduced in length (from the rear), to better match the stabiliser parts. After trimming the canopy, but before fixing it in place with white glue, there is a small piece of folded etch metal structure to glue in place at the rear of the cockpit opening, onto which a pilots headrest or pad is applied. The long canopy does require careful trimming to get a good join and may need a hand with tape or bands to hold it in place until the glue dries. The undercarriage parts are fine, but the forward facing doors had to be shortened to match the length of the undercarriage. A tail-wheel well is not present, so some modellers may prefer to open up the fuselage here to correct this feature, although this will mean additional scratchbuilding to support the tail wheel itself. The propellor is moulded as a single piece, thus no tricky alignment of the blades. The spinner has a back plate onto which the prop itself is glued onto.
Colour options.
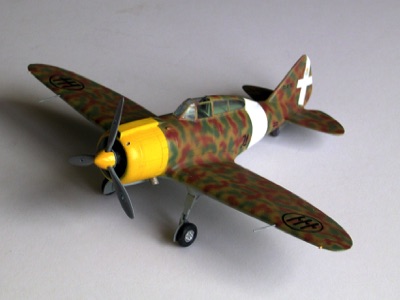
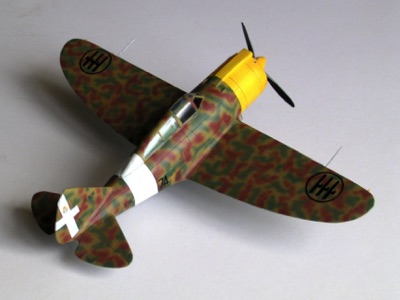
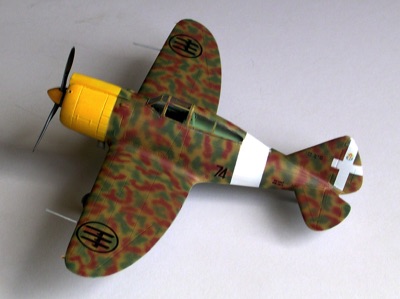
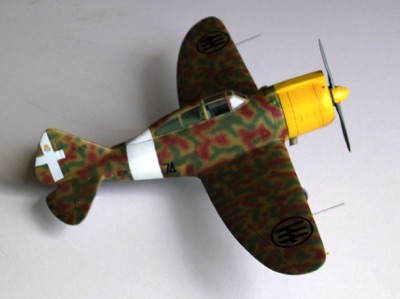
There are two schemes to choose from, both with similar three-mottle schemes, but one of them has a yellow cowl. They are both Sezione Sperimentale aircraft of the 23° Gruppo. With the canopy previously masked with Tamiya tape, grey primer was applied over the model to check for any flaws, of which none were apparent. White was sprayed for the fuselage band and base for the yellow cowl. When dry, the cowl was sprayed yellow and allowed to dry, then masked. The lower camouflage was next, followed by the three tone mottle scheme, of which Humbrol 63 was used as a base for the 149 and 118 mottles. After a coat of varnish, the decals were applied and worked just fine.
Conclusions.
Special Hobby have done a fine job here, giving us a much needed and accurate 1/72 model of the RE.2000. The level of cockpit detail, for example, is superb. Measurements taken from the model shows that it scales out almost perfectly and its construction posed no real problems as such, except maybe for the slightly short lower wing and the long one-piece vacform canopy, which demands a fair level of patience to get a good fit. These aside, I feel that this model can be safely recommended to all enthusiasts of Italian aircraft modelling.
Many thanks to Special Hobby for the review sample.

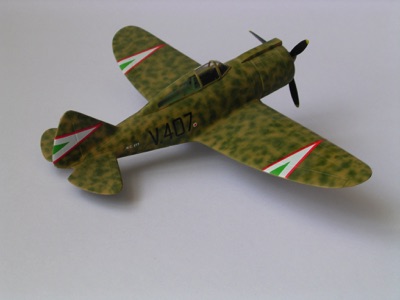
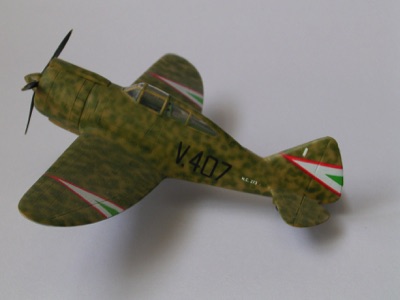
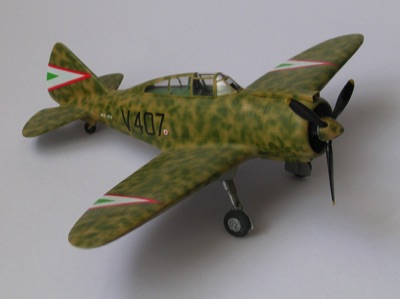
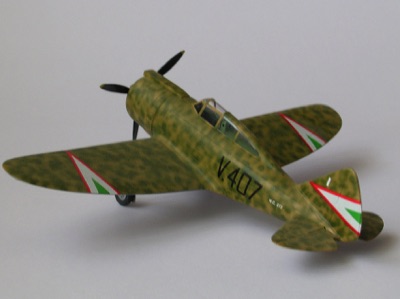
RE.2000 Heja
This is another Special Hobby release of their RE.2000 kit, this time with a choice of 4 markings provided for the export Hungarian "Héja 1" aircraft. Three of the schemes have the green, white & red tail surfaces and the fourth has the distinctive triangular markings. This aircraft was based on the Russian front in late 1941. All the schemes are the Italian style mottled scheme of a Giallo Mimetico 4 base with Verde Mimetico 2 mottles. I used enamels from the new WEM range of Regia Aeronautica paints
Any one who has read the original RE.2000 kit review will know that this kit is perhaps the best 1/72 RE.2000 produced. Only the large vacform canopy poses any problem, needing care when trimming to fit the fuselage. The amount of detail provided in the cockpit is outstanding.